How to Choose Drip Tape Fittings for Irrigation?
Choosing the right Drip Tape Fittings can determine whether an irrigation system delivers steady moisture or wastes water through hidden leaks. The decision begins with tape size, wall thickness, operating pressure, and the connector style required. A fitting that matches the outside diameter may still fail if its barb is too shallow or poorly formed.
In field installations, I have seen inexpensive connectors split near the inlet after several hot afternoons. Another system used strong fittings, but the tape was installed under excessive tension. The fittings were not the only problem. This matters because reliable irrigation depends on compatible components working together. Check manufacturer specifications before buying. Measure the tape carefully, and test a small section under normal pressure.
Small details matter.
Look for durable materials, secure seals, and smooth internal passages. Barbed takeoffs should grip the tape without cutting it. Gaskets should remain flexible during temperature changes. For sandy or silty water, filtration and regular flushing are just as important as fitting quality. End closures should be easy to open, especially when sediment collects inside the tape.
A practical selection also considers installation speed, repair access, and seasonal storage. Reusable valves may cost more, yet they can simplify maintenance across multiple growing cycles. Still, no fitting suits every farm. My earlier preference for one universal connector proved too simple. Crop spacing, water chemistry, climate, and pressure conditions can change the best choice. Careful testing remains the most dependable guide.
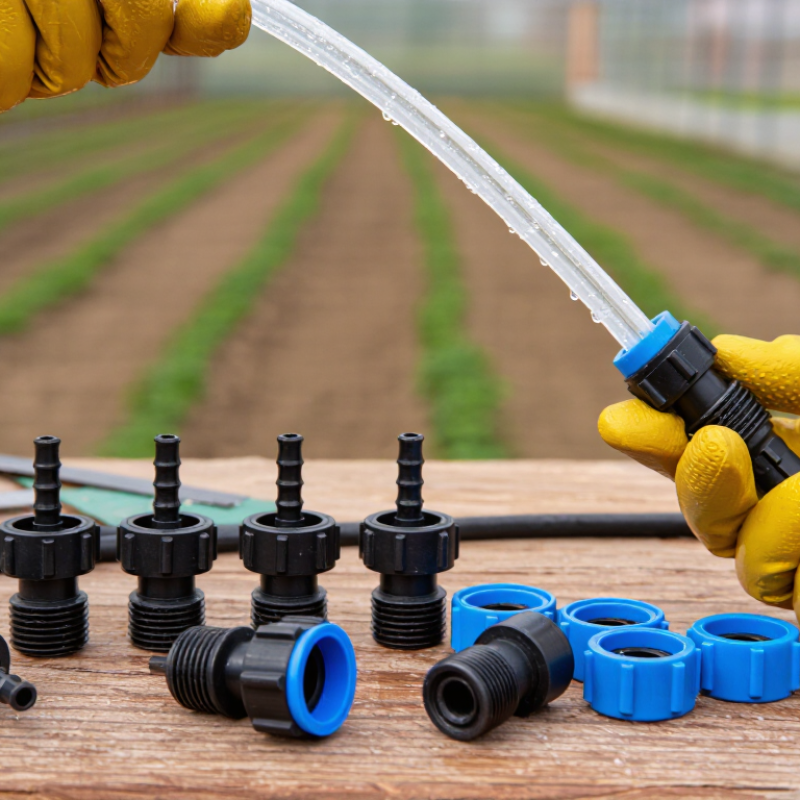
Understand Drip Tape Types, Sizes, and Connection Standards
How to Choose Drip Tape Fittings for Irrigation?
Choosing drip tape fittings starts with identifying the tape type. Thin-wall tape is lightweight and often used for seasonal vegetable production. Thicker tape tolerates longer exposure and repeated handling. Tape with built-in emitters needs fittings that protect its internal flow path. Do not assume every connector suits every tape. Measure twice. It matters.
Check the tape’s nominal diameter, wall thickness, emitter spacing, and operating pressure. Common sizes may look similar, but small differences can cause leaks or difficult insertion. A fitting should grip the tape firmly without cutting it. In field installations, I check the tape edge for stretching after connection. If the opening becomes oval, the punch or connector may be poorly matched. This detail is easy to miss.
Connection standards also vary by region and manufacturer. Threaded outlets may use different thread profiles, while barbed fittings depend on precise outside diameters. Confirm whether the system uses metric or inch-based dimensions. Match the mainline valve, filter, and pressure regulator before ordering adapters. A connector that fits the tape can still fail at the manifold. That mistake wastes water and time. Use compatible seals, and test each joint at working pressure before covering the tape. I have found that a short pressure test reveals more than visual inspection alone. Some installations still need adjustment after testing, especially when water temperature changes the tape’s flexibility.
Match Fittings to Tape Diameter, Wall Thickness, and Water Pressure
Choosing drip tape fittings starts with the tape’s actual diameter, not a guess from the package.
Measure the tape when it is empty and relaxed. A fitting that is slightly too large may leak, while an undersized connector can damage the tape during installation.
Check the tape’s wall thickness, too. Thin-wall tape needs gentle insertion and a fitting with a reliable locking mechanism.
Thick-wall tape usually accepts stronger compression, but it still requires careful handling.
Water pressure also changes the fitting choice.
Use pressure ratings that exceed your system’s working pressure, including pressure surges. A filter, regulator, and flush valve can protect both the tape and its connections.
In field installations, I have seen a well-fitted connector leak because pressure rose after a valve opened too quickly. That detail is easy to overlook. Measure pressure near the tape, not only at the pump.
Tips:
Cut tape cleanly with a sharp tool. Avoid angled cuts.
Push the fitting fully into the tape, then check the seal by running water slowly.
Inspect connections after the first irrigation cycle.
If a joint remains damp, replace it rather than tightening it repeatedly.
Some fittings appear secure but loosen as the tape warms.
Test a small section before installing hundreds of meters.
Choose Connectors for Straight Runs, Branches, Ends, and Repairs
Choosing drip tape fittings starts with matching the connector to the job. For straight runs, use couplers sized to the tape’s measured outside diameter. A tight fit matters more than a familiar size. Check wall thickness too, because thin tape can split under excessive clamping. Press the tape fully over the barb, then secure it with a locking ring. Water should not spray at the joint. It should form a quiet, even line.
For branches, select a takeoff fitting with a firm inlet and a valve when zones need separate control. Punch the main tape carefully, not with a rough knife. A clean, round hole reduces tearing. For row ends, use end closures that can be opened for flushing. Fold-over methods may work in a small garden, but they often loosen after pressure changes. Keep each branch aligned with the crop row. Crooked connections pull on the tape.
Repairs need a different mindset. Cut out damaged sections instead of covering a split with tape. Use a repair coupler matching both diameter and wall thickness. Rinse soil from the tape before reconnecting it. Then run water briefly and inspect every joint by hand. I have seen leaks blamed on fittings when grit was the real cause. Still, careful choices can fail in heat or poor installation. Recheck connections after the first irrigation cycle, especially where the ground settles.
Check Material Quality, Compatibility, and Installation Requirements
Choosing drip tape fittings starts with material quality. In field installations, UV-resistant polyethylene fittings usually handle sunlight and seasonal moisture well. Acetal or reinforced nylon can offer better strength near valves and pressure changes. Avoid fittings with brittle surfaces, uneven molding, or weak threads. A low-cost part may leak after several weeks.
Check the fitting against your tape’s diameter, wall thickness, and connection style. A fitting made for thin tape may cut thicker tape during tightening. One designed for a larger outlet may leave a loose seal. Match the barb size carefully. Also check whether the fitting uses a gasket, compression ring, or locking nut. These details affect long-term reliability. I once selected fittings by diameter alone, and the seal still failed. The tape wall thickness was different.
Installation requirements matter just as much. Cut the tape cleanly, without crushing its edge. Push it fully over the barb, then tighten the locking nut by hand. Excessive force can deform the tape. Keep the connection free from soil and sand. After installation, run water at low pressure and inspect every joint. Then increase pressure gradually. A small leak is easy to miss. Test again after several irrigation cycles, because heat can soften the tape and expose a weak connection. Even quality fittings need correct handling.
How to Choose Drip Tape Fittings for Irrigation?
Check material quality, compatibility, and installation requirements before selecting a fitting. The chart shows representative continuous service-temperature ranges for common fitting materials; always verify the actual product specification.
Selection guidance: Match the fitting size to the drip tape diameter and wall thickness, confirm that the material is suitable for the water quality and fertilizer chemicals, and select a connection style that can be installed securely without damaging the tape. Use compatible clamps, gaskets, or locking rings when required, and check for leaks after pressurizing the system.
Compare Durability, Maintenance Needs, and Total Irrigation Cost
Choosing drip tape fittings is a cost decision, not merely a connection decision. USDA NRCS Irrigation Guide reports that well-managed microirrigation commonly reaches 80–90% application efficiency. That advantage disappears when fittings leak, clog, or loosen under field pressure. Select fittings rated for the tape’s operating pressure, temperature, and wall thickness. UV-stabilized plastic usually survives repeated sun exposure better than unprotected material. Still, “durable” does not mean permanent.
Maintenance often determines the real bill. A fitting with a tight seal can reduce daily pressure checks and water loss. A fitting that needs frequent retightening can consume labor across thousands of rows. The U.S. Environmental Protection Agency’s WaterSense guidance emphasizes scheduling, leak control, and targeted irrigation as major efficiency practices. Build those habits into the fitting choice. Choose layouts that allow easy flushing and replacement. Keep spare connectors nearby. Small failures become expensive during peak watering.
Total irrigation cost includes purchase price, labor, lost crop access, and wasted water. A low-cost barb may look attractive, but poor insertion can split thin tape and create repeat repairs. Compression fittings often cost more initially, yet they may lower replacement frequency. The comparison is imperfect. Soil movement, water quality, and installer skill can outweigh the fitting material. In hard water, add filtration and inspect joints weekly during the first season. Record leaks, repair time, and replaced parts. Your own field data may challenge the catalog’s promises.
How to Choose Drip Tape Fittings for Irrigation? Compare Durability, Maintenance Needs, and Total Irrigation Cost
| Fitting Type | Typical Material | Connection Method | Suitable Operating Pressure | Typical Field Life | Leak Resistance | Maintenance Requirement | Installation Time | Typical Unit Cost (USD) | Estimated Total Cost per 1,000 ft of Tape | Best Use Case |
|---|---|---|---|---|---|---|---|---|---|---|
| Barbed Start Connector | UV-stabilized polypropylene or acetal plastic | Barbs insert into the tape; secured with a locking nut, ring, or clamp | Usually suitable for low-pressure drip systems up to approximately 15–20 psi, depending on the fitting design | 3–8 seasons when protected from sunlight, freezing, and impact | Medium | Inspect for loose connections and replace damaged tape ends or seals | Approximately 1–3 minutes per connection | $0.20–$0.80 | $12–$48, assuming 60 connections per 1,000 ft | Low-cost seasonal vegetable production and quick field installation |
| Compression Start Connector | Polypropylene, acetal plastic, or reinforced engineering plastic | Tape is inserted into a compression collar or nut that creates a mechanical seal | Commonly suitable for approximately 10–25 psi when correctly installed; always verify the fitting rating | 5–10 seasons under normal agricultural use | Low to Medium | Occasional inspection; compression parts may need replacement after repeated removal | Approximately 2–4 minutes per connection | $0.40–$1.50 | $24–$90, assuming 60 connections per 1,000 ft | Reusable layouts where reliable sealing is more important than the lowest purchase price |
| Grommet and Take-Off Connector | Flexible rubber or EPDM grommet with a polypropylene take-off | Grommet seals a drilled hole in the header pipe; take-off connects to the drip tape | Typically used in low-pressure systems, commonly around 8–20 psi | 3–7 seasons; rubber sealing performance decreases with UV exposure and chemical aging | Medium | Check grommets for hardening, cracking, and seepage at the header pipe | Approximately 2–5 minutes per connection | $0.25–$1.20 | $15–$72, assuming 60 connections per 1,000 ft | Connecting many tape rows directly to polyethylene or PVC submains |
| Take-Off with Integrated Valve | Polypropylene or acetal plastic with a small shut-off valve | Grommet or threaded take-off connects to the header; valve controls each row | Generally suitable for approximately 8–20 psi in drip-tape applications | 4–8 seasons, depending on valve use and water quality | Low to Medium | Flush periodically; inspect valve stems and seals for blockage or leakage | Approximately 3–6 minutes per connection | $0.70–$2.50 | $42–$150, assuming 60 connections per 1,000 ft | Fields requiring row-by-row shut-off, flushing, or irrigation-zone adjustment |
| Tape Repair Coupler | Polypropylene or acetal plastic with barbed or compression ends | Damaged tape is cut cleanly and each end is inserted into the coupler | Typically suitable for approximately 10–25 psi, subject to the connector design | 3–8 seasons when protected from physical damage | Medium | Keep spare couplers available; inspect repaired sections for movement and leaks | Approximately 1–3 minutes per repair | $0.25–$1.20 | $2.50–$12 per 10 repairs | Repairing punctures, cuts, and end-of-row damage without replacing an entire tape run |
| Tape End Closure or Flush Valve | Polypropylene, acetal plastic, or flexible rubber | Folds, clamps, caps, or valves close the downstream end of the tape | Normally used at drip-tape pressures of approximately 8–20 psi | 3–8 seasons; valves generally last longer than simple fold-and-clamp closures | Medium | Open periodically for flushing; check that closures remain tight during operation | Approximately 1–3 minutes per row | $0.15–$1.50 | $0.15–$1.50 per row end | Systems where regular flushing is needed to reduce sediment accumulation |
| Threaded Adapter with Hose or Pipe Connection | Polypropylene, acetal plastic, brass, or stainless steel | Threaded connection joins a header, manifold, hose, or drip-tape take-off | Often suitable for approximately 15–40 psi, but the lowest-rated component controls the system | 5–15 seasons; metal versions may last longer but can corrode in some water conditions | Low | Check threaded joints, washers, and sealant; avoid over-tightening plastic threads | Approximately 3–7 minutes per connection | $0.60–$3.00 | $36–$180, assuming 60 connections per 1,000 ft | Permanent or semi-permanent manifolds requiring stronger, serviceable connections |
| Clamp or Saddle Take-Off | Polypropylene, nylon, stainless steel, or galvanized metal | Clamps around the header pipe and seals a drilled outlet with a gasket or washer | Commonly suitable for approximately 15–40 psi when properly tightened | 5–15 seasons, depending on clamp material, gasket quality, and corrosion exposure | Low | Retighten only when necessary; inspect gaskets and metal parts for corrosion | Approximately 4–8 minutes per connection | $1.00–$4.00 | $60–$240, assuming 60 connections per 1,000 ft | Higher-durability header connections and installations subject to frequent handling |
| Cost assumptions: Prices are typical non-brand retail ranges in USD and vary by region, material, quantity, and fitting size. The estimated connection cost assumes 60 tape connections per 1,000 ft and excludes drip tape, header pipe, filters, pressure regulators, labor, water, pumping energy, and repairs. Actual total irrigation cost is strongly affected by filtration quality, water pressure control, UV exposure, freezing, fertilizer or chemical compatibility, and how often the system is assembled and disassembled. | ||||||||||
| Selection guidance: Choose compression or clamp-style fittings when leak prevention, reuse, and reduced maintenance are priorities. Choose barbed fittings when low initial cost and fast seasonal installation are most important. Use flush valves or end closures that can be opened easily when the water supply contains sand, algae, or other suspended particles. | ||||||||||
